DPS923 & MAP523
Mobile App Development for iOS
Notes Topics Weekly Resources Graded work Professor Code examplesInteraction essentials
Last week, we introduced a large number of topics that will help you build iOS apps. We did get started on some interaction foundations, by getting content to-and-from the view and the code.
This week, we continue learning some more interaction essentials.
Topic coverage
To review last week’s coverage, here are the interaction foundations we learned:
- Programmatically setting the text of a UI label
- Changing its value with a UI button
- Using a UI slider, reading its value, and reacting
Doing all this enabled you to learn:
- Outlets, which connect a UI object to a variable in your code
- Actions, which handle events raised by a UI object
This week, we’ll go further, and quickly. Here’s what’s planned:
- Working with a single UI text field, and keyboard handling essentials
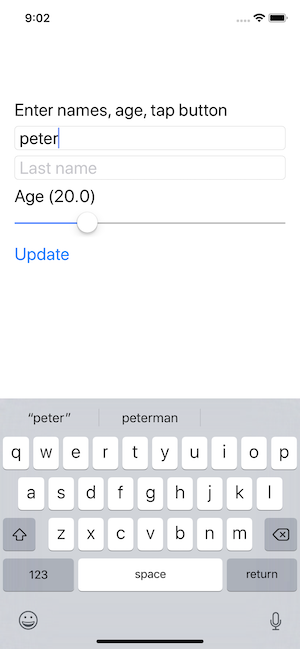
- Working with multiple UI text fields, and/or a view that has other interactive controls
- A discussion of the iOS app lifecycle, and the iOS runtime
- An introduction to the important delegation concept/pattern
- Handling events raised by the iOS runtime (both app lifecycle related, and user interaction related)
- Data source, a design pattern (part of the “MVC” pattern)
- Picker view, a UI object
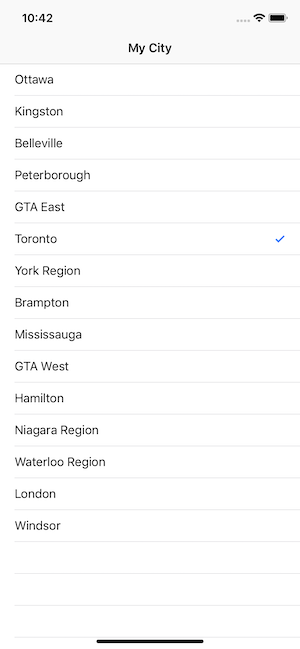
- Table view, a UI object
Here are a few notes or discussion points that will guide our learning journey.
Text field
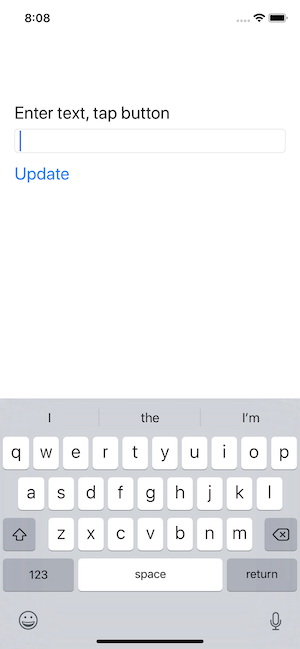
Consider a simple view with three UI objects:
- Text field
- Button
- Label

It seems pretty easy to get started with the task of getting input from the user (via the text field) and displaying the results (via the label). For example, here’s the code in the body of a view controller that implements the barely-essential and therefore incomplete code:
// Variables

// Outlets

@IBOutlet weak var incomingText: UITextField!
@IBOutlet weak var textResult: UILabel!

// Lifecycle

override func viewDidLoad() {
    super.viewDidLoad()
}

// Actions

@IBAction func updateView(_ sender: UIButton) {

    // Optional... transform to upper case
    textResult.text = incomingText.text?.uppercased()
    // Clear the incoming text field
    incomingText.text = ""
}
The problem is that it does not handle the keyboard properly.
We want the keyboard to disappear after the user taps the button. So, we’ll learn how.
Then we’ll go deeper, with a more interesting example, which will enable us to introduce and disuss the delegation topic.

iOS runtime; app lifecycle
Be prepared to listen, think, learn, question, then apply this new knowledge. Students who are familiar with web apps might think that iOS apps work the same, but no, they don’t.
The main take-away is that the code we write does NOT control the logic flow and workflow in the app.
Instead, we design the interaction pattern (before we write any code!), and then create and code program objects (classes etc.) that react to user interaction and events that happen on the device. We’re just writing a bunch of event handlers.
The iOS runtime is in control.
Another interesting difference, when compared to web apps, is that our app is stateful when loaded. As we create objects, they remain in memory, and continue to be available, until they are deliberately destroyed, or the app is terminated.
Delegation discussion
What does delegate or delegation mean in the real world? Google results will remind you. When people are involved, a delegate will perform a task or duty at the request of someone. That “someone” is delegating the task to a delegate.
In iOS, a delegate is an object that performs a task at the request of another object. As above, that “other object” is delegating the task to a delegate.
The delegator is often - but not always - a built-in iOS SDK (framework) object. For example, a text field (UITextField). We do not have access to the source code of UITextField, so we cannot write custom code that handles events from it. The solution is to configure a delegate - often a controller in our app - with the custom code.
There is a standard technique for declaring/identifying/configuring the delegate. And, there’s a standard technique for writing code in the delegate to handle events.
Where do we see delegation in our app? While it’s incorrect to say “everywhere”, you will find that it is almost everywhere. Some UI objects depend on delegation to work. And, we’ll soon see the value of delegation to build that in to our app design (and logic and work flows).
Data source; data model; MVC
Today, we are introduced to the idea of a “data model object”.
Today, we will configure the data model inside a view controller. In the near future, we will create a custom data manager class that will serve the needs of ALL view controllers in the app.
UI object - picker
One way of selecting an item from a collection.

UI object - table view
A common way of interacting with a collection of data.

How can you make this kind of app? Here are some instructions - try them. Soon, there will be a project template available, but not before your Assignment 1 is due.
- Create a new project
- In the project navigator, select the (yellow) project folder (second from top)
- Press Cmd+N (to create a new item), choose Cocoa Touch Class, as a subclass of UITableViewController, class name “CityList”
- Show the main storyboard
- Delete the existing view controller
- From the object library, add a table view controller
- On the identity inspector, set its class to the just-created CityList controller
- Embed it in a navigation controller
- Select the nav controller, attributes inspector, check/select/mark “Is Initial View Controller”
- Select the “Prototype Cells” rectangle on the table view controller; on the attributes inspector, enter “default” into the “Identifier” setting
- Edit the controller code; uncomment the
tableView(_:cellForRowAtIndexPath:)method; and replace the “reuseIdentifier” string with “default” (the same string as in the previous step) - Edit the controller code to materialize the data source, then configure the table view data source and delegate methods