![]()
DPS923 & MAP523
Mobile App Development for iOS
Notes Topics Weekly Resources Graded work Professor Code examplesMapping services essentials
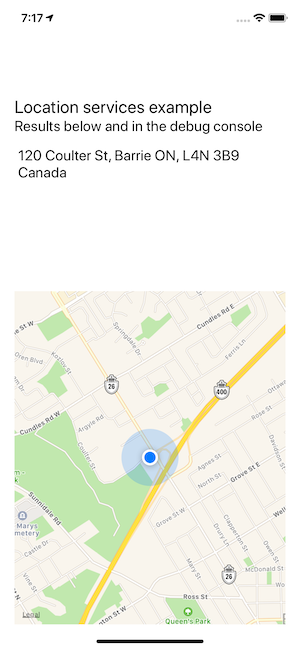
This document will introduce you to the use of mapping services in an iOS app. Before continuing, make sure that you know how to use location services.
A scene in an iOS apps can include an MKMapView object, which is a rectangle. It will use the network to fetch map content from the Apple mapping services infrastructure (so obviously the device must be able to use the network). Your app’s logic can add annotations and other data to the map, if desired.
Getting started
It is easy to get started with a map. Assume that you have a standard view controller and scene, with some space on it to hold a map.
At a minimum, do the following:
- On the storyboard, on the scene, add a map view from the object library, and size it.
- On the attributes inspector, check (mark) the Shows > User Location checkbox.
- Create an outlet to the view controller.
- In the controller,
import MapKit - At the appropriate place - when you have an actual location coordinate - write some code that will define a zoom region, and then show that region on the map.
At a minimum, the code will look similar to this:
// Assume that "locationMap" is the outlet name
// for the map view on the storyboard scene

// Prepare the map's visible region
let region = MKCoordinateRegion.init(center: self.locationMap.userLocation.coordinate, latitudinalMeters: 2000, longitudinalMeters: 2000)

// Show the map
self.locationMap.setRegion(self.locationMap.regionThatFits(region), animated: true)
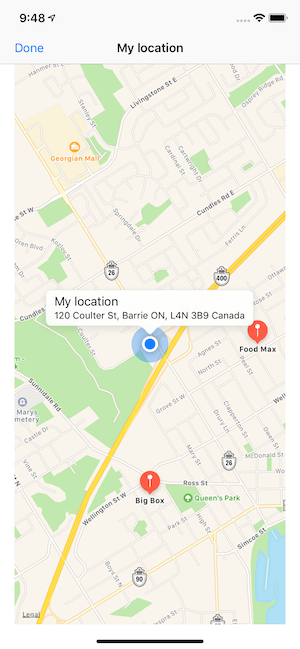
The full-scene map view approach
This is the preferred approach, using a full-scene map, displayed modally from a presenter. After the user is done with the map, a button is tapped, and the modal scene is dismissed. This is a typical “task”, similar to add, edit, and details.
Open the W11a4MapTask code example, and refer to it as this section is presented.
First, as a “task” scene and controller, it’s embedded in a nav controller, and presented modally. At a minimum, it must have a button (in the nav bar) that will enable it to be dismissed. It includes a map view, with an outlet connection to the controller. As above, check (mark) its “Shows > User Location” checkbox. The controller must be the map view’s delegate (which you can set on the storyboard or in code).
The presenter must conform to a protocol, typical of all the “task” scenes. The presenter must have a way to show (segue to) the map scene, and therefore must have code in the `prepare(for: sender:) method, and possibly pass data.
Pro tip:
Also implement theshouldPerformSegue(identifier: sender:)method, and check for network connectivity. If no network, prevent the segue.
And maybe check elsewhere (viewDidLoad()?) for the network, and if not active, disable the UI that presents the map scene.
In the controller - which (remember) must conform to the MKMapViewDelegate protocol - a method named mapView(mapView:didUpdate:) will listen for the user location to be settled. That’s the method in which we write code.
What code? Center the map around the user location, or the center point for it and all passed-in annotations (if present). Also if present, show the map annotations.
Your own center point for the map
The logic changes somewhat when you want your own center point for the map, instead of the current user location.
For example, assume that you want the center point to be a coordinate that is fetched from a data storage location (e.g. web API or Core Data).
In this situation, you do not care about the delegate method mapView(mapView:didUpdate:. Instead, you must do something like this:
- Define a variable to hold the coordinate
- Add code to
viewDidLoad()that updates the map with the passed-in coordinate (the code will be similar to what’s in the delegate method) - In the presenter controller, get the coordinate data, and pass it in when the segue is handled
Map annotations
By default, the techniques in this document will cause a blue dot to be drawn in the center of the map view. The blue dot is the user’s location, which is independently acquired by the map. In other words, it doesn’t require its own location services coding.
What if you want other markings on the map?
Map annotations are the answer. The technique presented in the code example app will draw a red pin (or marker) on the map. Each of these is an object that conforms to the MKAnnotation protocol. As a result, we must write a fully-functional class to represent these objects. In the code example, see the MapAnnotation class for details.
The code example is configured to accept an array of zero or more map annotations into the map scene and controller. If present, the map annotations will be drawn.
Is there more?
Is there more functionality? Yes, too much for a one-term introductory course in iOS programming. Now that you have some fundamental knowledge and skills, you can build on them in the future.
Reference info
Apple document, MapKit.
Apple document, archived, Location and Maps Programming Guide.
Apple document, MKMapView.
Apple document, MapKit Annotations.
Apple document, Annotating a Map with Custom Data.