DPS923 & MAP523
Mobile App Development for iOS
Notes Topics Weekly Resources Graded work Professor Code examplesWeb API interaction more
This document introduces you to the essential knowledge and techniques for sending data to a web API, in an HTTP POST request.
Review the typical web API interaction technique
Remember the typical web programming technique for interacting with a web API. Each request must define:
- the HTTP method
- the resource URL
- headers (accept and/or content type, etc.)
- entity body data, if necessary (yes, for POST and PUT)
The requirements are exactly the same, no matter what programming language or platform you are working with.
Also, we strongly recommend that you open and use the Postman app while you are coding your iOS app. Use it to test your requests BEFORE you attempt to code them into your app.
New techniques
In the discussion about the essential and basic interaction with a web API, we used fetch (HTTP GET). The code we wrote assumed an HTTP GET request to a resource URL.
Request object
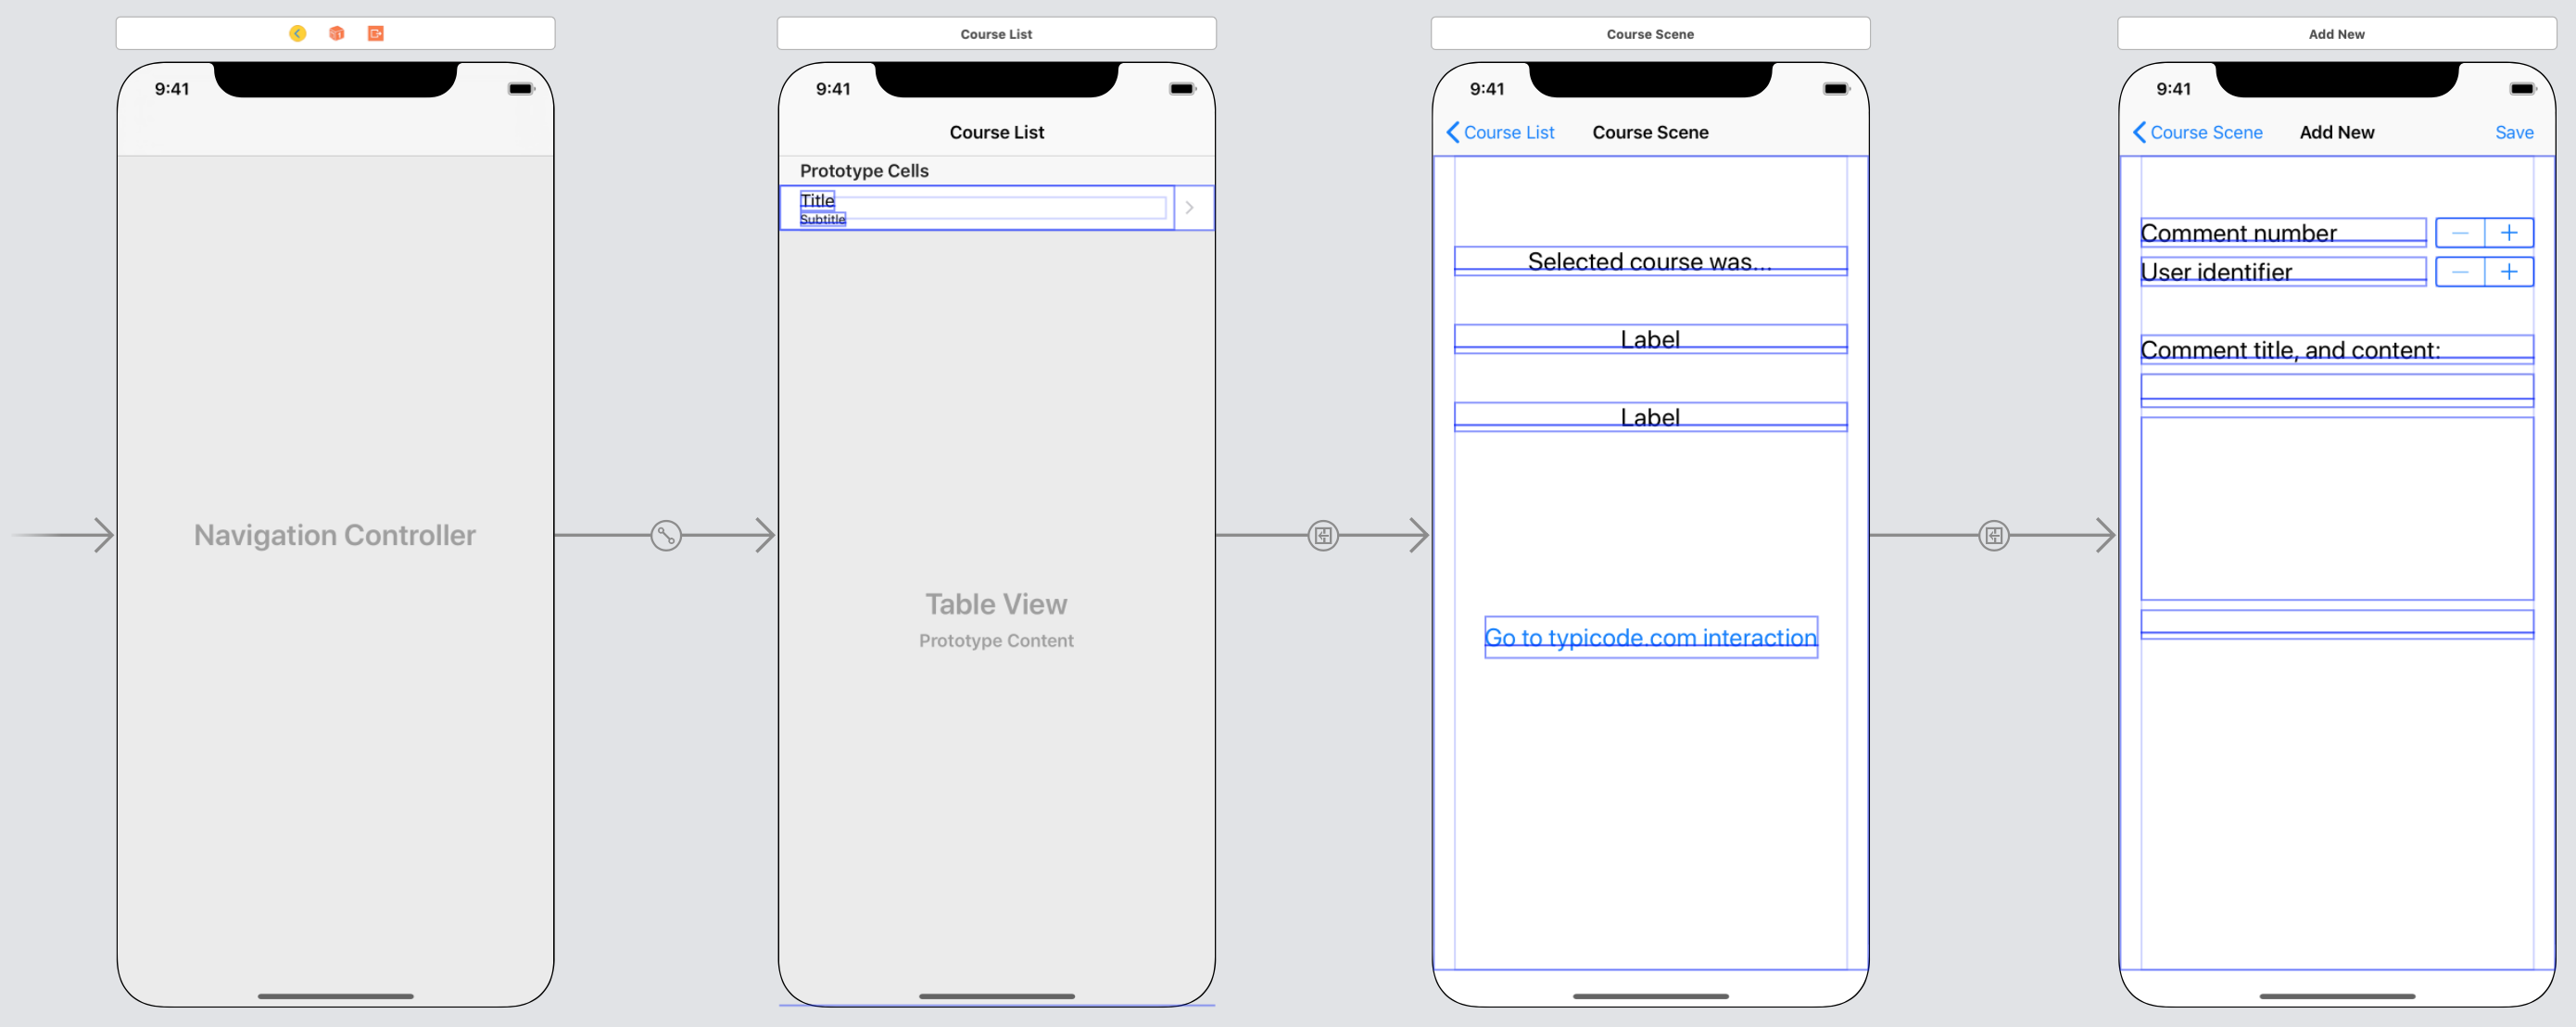
Open the W06a2WebApiMore code example, and study it as you continue to read this document. It is an app that’s based on the other code example, and it has one more standard scene in its navigation interface. Here’s the storyboard (click/tap to open it in a new tab/window):
Now, we will work with an HTTP POST request. In addition to the two items above, it must have headers and a body.
Therefore, we use an instance of URLRequest to make a custom request, so that we can specify HTTP POST, the desired header(s), and the body.
First, set the HTTP method:
request.httpMethod = "POST"
Then, set the header. Remember that we MUST set the content type header, with a value that matches the kind of data that the web API expects, and that we are sending.
request.setValue("application/json", forHTTPHeaderField: "Content-Type")
Entity body data
Gather the data to be sent, from the user interface (UI). If you have to modify and/or transform it, go ahead and do that.
The shape of the data MUST match the shape that the web API is expecting. Make sure that you have defined a data model class that matches the expected shape; this class must have an initializer.
Now, make a new instance of the data model class, based on the data gathered in the UI. Add it to the request’s body property (which is of type Data):
// Prepare the data to be sent
let encoder = JSONEncoder()
// For this example, we will disable error-handling with try!
request.httpBody = try! encoder.encode(newItem)
At this point in time, the request has been configured.
Data task updates
The setup or creation of the data task object is a bit different. The initializer (constructor) will use the new request object, instead of a simpler URL object:
// Other code example, with a URL object...
let task = URLSession.shared.dataTask(with: url) { (data, response, error) in

// New technique, with a URLRequest object
let task = URLSession.shared.dataTask(with: request) { (data, response, error) in
The remaining code is similar to the other code example, with obvious changes needed to handle the different data type in the response. (It also has a bit more error-handling code.)
Summary
In this document, you learned that sending data to a web API is similar to fetching. There are a few notable differences in our approach:
- We create and configure a custom “request” object
- We gather and package the data to be sent in a way that the web API expects and can use
