![]()
DPS923 & MAP523
Mobile App Development for iOS
Notes Topics Weekly Resources Graded work Professor Code examplesDPS923 MAP523 Week 1 Notes
Monday, January 6 - hands-on in the computer-lab
The theme for this week is to get comfortable with the iOS programming environemnt.
We will do what we can in the Monday class.
The remaining content can be covered in the Thursday class.
Plan for this week
We plan to do the following:
-
Course introduction and preview
-
Mac and macOS (re)introduction
-
Xcode development environment tour
- Swift language introduction
- Using the Swift Playground
- Using the Swift language and programming docs
docs.swift.org
- Creating simple one-screen iOS apps
- Hello world, launch screen, and text label on storyboard
- Keyboard handle, text field, button, label, delegate
- Slider and interaction, more delegate
Learning resources
Your professor will introduce you to some getting-started learning resources.
And, how to use a search engine to locate authoritative reference information.
Code examples
The course’s GitHub repo has code examples for many topics and techniques. You can download a zip of the code repo, or clone it periodically.
This week, to help you get started in the course, some sequenced how-to info will be shown below. In class, you will learn some of the reasons behind the info, and have an opportunity to ask questions, and practice using Xcode.
App 1, named W01a1Label
This app gets you started with a simple iOS app, and interaction. Then:
Create a new project, as demonstrated in class
Run it in the simulator, Cmd+R
Then, switch back to Xcode, and stop the app with Cmd+. (dot/period)
Select LaunchScreen.storyboard for editing
Show the user interface (UI) object library with Shift+Cmd+L
Select the label, then click-drag-drop to the storyboard scene
Edit the label (e.g. “App launch screen”), and edit its attributes if you wish
Run the app again, notice what happens, then switch back to Xcode and stop the app
Select Main.storyboard for editing, add a suitable label
Size the label so that it is the full width of the view, and center its content (by using the attributes inspector)
Run the app again, notice what happens, then switch back to Xcode and stop the app
Next, let’s programmatically set the label’s content. We are going to do the following tasks:
- Connect the UI object to an “outlet” variable in the source code of the scene’s view controller class
- Declare and initialize a class variable in the source code
- In the
viewDidLoad()event-handling function, update the UI object with the value from the class variable
Task 1: We must connect the label on the scene with the source code. In this app, the scene’s code is in ViewController.swift. The connect task is both visual and tactile, so we must setup the right coding environment. For the best results, do the following:
Select Main.storyboard for editing
Cmd+0 (zero) to hide the left-side navigators area
Option+Cmd+0 to hide the right-side inspectors area
On the scene’s “dock” (just above the scene), click to select the yellow left-most “View Controller” icon (it will then be highlighted with a blue background)
Option+Cmd+return to show the Assistant Editor
At this point, the storyboard editor panel is on the left half of the display, and the code editor panel is on the right side. Then:
Click to select the UI label
Press-and-hold the keyboard’s “control” key
Click-drag-drop the UI label to the source code, then release the “control key” and the pointing device actions
A connection dialog will appear; configure it as follows…
The Connection is an Outlet
The Name is whatever you want (e.g. topLabel)
The Type is UILabel
Press return or click the Connect button, and notice the new source code statement
@IBOutlet weak var topLabel: UILabel!
Here is a short video clip (which you can view in the Safari browser) that shows this technique to create an outlet connection:

What is @IBOutlet?
It is a type qualifier for the variable. From the Apple docs:
The type qualifier IBOutlet is a tag applied to an property declaration so that the Interface Builder application can recognize the property as an outlet and synchronize the display and connection of it with Xcode.
What is weak?
It is an option for the variable. From the Apple docs:
An outlet is declared as a weak reference (weak) to prevent strong reference cycles.
More information about connecting UI objects to code is in the Xcode docs.
Task 2: Declare and initialize a class variable in the source code. For example:
// Variables
var labelText = "App"
Task 3: In the viewDidLoad() event-handling function, update the UI object with the value from the class variable. For example:
topLabel.text = labelText
Remember our in-class discussion:
- Most text-oriented UI objects have a “text” property.
- Many number-oriented UI objects have a “value” property.
Bonus task: Write a function that does task 3. Why? Just to prove that you can add your own function to an existing view controller class. Then, edit the viewDidLoad() code to call the function. For example:
// New function
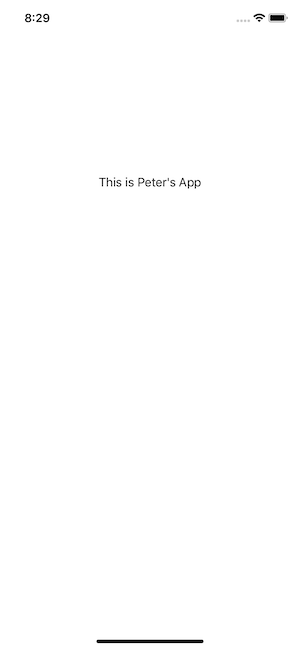
func setLabelText(text: String) -> String {
return "This is \(text) \(labelText)"
}
// In viewDidLoad(), old code...
//topLabel.text = labelText
// New code...
topLabel.text = setLabelText(text: "Peter's")
App 2, named W01a2BtnLabel
The goal is to get started with simple interaction, where a button will set the value of a label.
Create a new project, as before
Configure a launch scene; this time, use the attributes inspector to change some settings (size, content, alignment, colour)
On the main scene, add a label, and then a button
Edit the settings of both, to increase the font size, set the width to both margins, and center-align the content
Similar to the previous app, add a variable to hold the label text
Similar to the previous app, add a function to set the value of the label text
At this point, this app should work like the first app above.
Next, let’s make the button do something. We want to create an “action”. The task is similar to the outlet-creation task from above:
Select Main.storyboard for editing
Cmd+0 (zero) to hide the left-side navigators area
Option+Cmd+0 to hide the right-side inspectors area
On the scene’s “dock” (just above the scene), click to select the yellow left-most “View Controller” icon (it will then be highlighted with a blue background)
Option+Cmd+return to show the Assistant Editor
At this point, the storyboard editor panel is on the left half of the display, and the code editor panel is on the right side. Then:
Click to select the UI button
Press-and-hold the keyboard’s “control” key
Click-drag-drop the UI button to the source code, then release the “control key” and the pointing device actions
A connection dialog will appear; configure it as follows…
The Connection is an Action
The Name is whatever you want (e.g. updateLabel)
The Type is UIButton
The Event is Touch Up Inside
The Arguments is Sender
Press return or click the Connect button, and notice the new source code statement
@IBAction func updateLabel(_ sender: UIButton) {
}
Here is a short video clip (which you can view in the Safari browser) that shows this technique to create an action connection:

Next:
Update the viewDidLoad() function, by reverting to the original behaviour, to set the label text to the value in the local variable
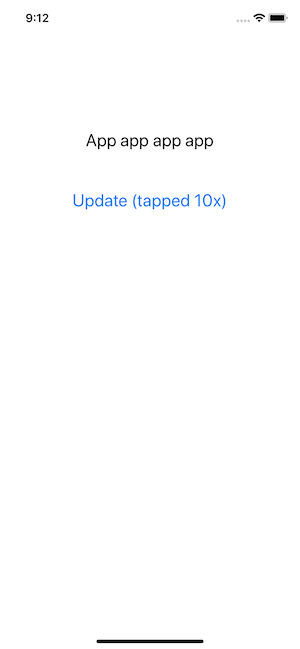
Write code in the new button-handling function that appends text to the label; something like this:
// Append text to the label
topLabel.text = topLabel.text! + " app"
Extra fun
As shown in class, let’s modify the behaviour - if the label text gets too long, reset it to the original “App” text. And, show the number of times the button has been tapped.
The label text length check is easy. Add new code after the existing code in the updateLabel(_:) function:
// Check label text length
if topLabel.text!.count > 30 {
    topLabel.text = "App"
}
The other task needs a new class variable to keep track of the number of button taps; initialize it as zero. Then add code to the top of the updateLabel(_:) function to update the button title. Notice that the function argument includes “sender”, which is a reference to the button. Therefore, we can just use that to update the button title:
// Update button title
buttonTaps += 1
sender.setTitle("Update (tapped \(buttonTaps)x)", for: .normal)
Alternatively… we could create an outlet for the button, and use that variable name.
App 3, named W01a3LblSlider
The goal is to learn how to interact with a slider. Here’s how:
Create a new project, as before
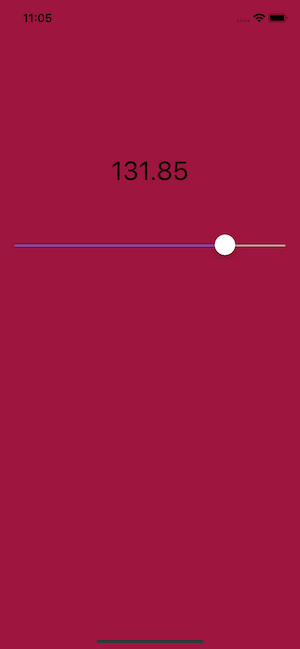
Add a label, size it full-width between the margin guides, center it, font size 30 or more
Add a slider, size it full-width between the margin guides
Configure the slider’s values…
- Minimum 20
- Maximum 160
- Value 45
Create an outlet for the label
Create an outlet for the slider too
Create an action for the slider (make sure you remember to configure the “Type”)
In viewDidLoad(), set the label text to the value of the slider
Bonus - configure the value to have two decimal places:
sliderValue.text = String(format: "%1.2f", theSlider.value)
Run the app, to ensure that it does display the slider value. Next, configure the slider change action function: Write code that will update the label with the current value of the slider.
Notice the repeated code statement in two places. Refactor the code, by adding a function that has that code statement. Then call the function from each place. Yes, we know that it’s just one statement, but you need practice writing Swift functions.
Next, we will programmatically set the background colour. And, the background colour will change as the slider value changes.
First, let’s configure a starting background colour value. The “view” is the rectangle that we are interested in. How do we know this? Open the main storyboard in the editor. Notice the left-side area, which shows the hierarchy of UI objects. The “View” is the container for the label and slider. The view controller’s view property is a reference to the view, and view has a backgroundColor property.
Write a function that sets the background colour. It will take one Float argument. Its code will look something like this:
// The UIColor initializer wants parameter values
// between 0.0 and 1.0, so the calculation below
// ensures that the values are in the range
// The calculation was done by trial and error
self.view.backgroundColor = UIColor(red: CGFloat(sliderValue * 1.5)/255.0, green: CGFloat(sliderValue * 0.2)/255.0, blue: CGFloat(sliderValue * 0.6)/255.0, alpha: 0.8)
Now, call this function from both viewDidLoad() and the slider changed function.
Remember to view the code examples, and try to re-create them yourself.
Summary
Here’s a list of topics that we learned something about this week:
- macOS file system and using Spotlight
- Xcode IDE essentials, start, use, quit
- Xcode Swift Playground for learning, quick tests, and prototyping
- Swift language essentials, types, variables, output, control flow
- Swift functions, simple, create then call
- Simple one-screen (view) iOS app
- Role of “storyboard”, LaunchScreen and Main
- Adding and configuring user interface (UI) objects on the storyboard, label, button
- Role of the “app delegate”
- Role of a “view controller”
- Xcode editing, assistant editor, show/hide the navigators and the inspectors
- Many Xcode keyboard shortcuts
- An “outlet”, as a reference to a UI object; declaring and using
- An “action”, as a handler for a user interaction with a UI object
- Role or purpose of base class functions (e.g.
viewDidLoad()) - More UI objects, slider
- Role of a “view” (which is managed by a view controller)
- The iOS object that represents a colour (UIColor)