![]()
DPS923 & MAP523
Mobile App Development for iOS
Notes Topics Weekly Resources Graded work Professor Code examplesXcode and deployment
This document will help you configure Xcode to enable app deployment to your device(s).
This note was most recently updated in September 2019.
Overview, how to
There are several steps:
- Use your Apple ID
- Add your Apple ID to Xcode
- Attach your device to the Mac
- Configure an app for device deployment
- Build and run (Command+R)
Use your Apple ID
It is assumed that you already have an Apple ID. If you do not, then create a new Apple ID.
If you decide that you want a new Apple ID that you will use only for app development tasks (and for accessing the Apple Developer web site), then go ahead and create another Apple ID.
Add your Apple ID to Xcode
In Xcode, open Preferences, then focus on the Accounts panel (which should be mostly empty).
Add your Apple ID. After this task, it will appear on the left-side list, and the right-side details panel will show your name, and associate with a “Personal Team”.
As background info, there are three digital documents that Xcode needs in order to be able to deploy an app to a device:
- Development certificate
(identifies you as a developer) - Distribution certificate
(for those in the paid Developer Program, enables App Store use) - Provisioning profile
(identifies the specific app)
Typically, this setup process (adding your Apple ID, and the “Configure an app…” section below) together will be fetched automatically by Xcode. However, you may have to help it along at times.
Yes, this task can be done on the College Macs.
Just make sure to delete the account info before you finish using the Mac.
That can be done in Xcode Preferences, or by restarting the Mac.
Attach your device to the Mac
It is assumed that you have an iOS device (e.g. an iPhone). And a cable with Lightning and standard USB Type A connectors. Attach your iOS device to the Mac. (Yes, trust the computer, but don’t bother with other setup, like USB networking or iTunes.)
If you want to borrow an iOS device, and use it until the end of this DPS923/MAP523 course, contact your professor.
The College has a limited number of devices, and can loan one to you at no cost, assuming that it is returned at the end of the course in good working condition.
Configure an app for device deployment
In Xcode, open an app/project that will be deployed to the device. In the project navigator, select the project’s settings file, which will display in the editor area. There, select the “TARGET” item.
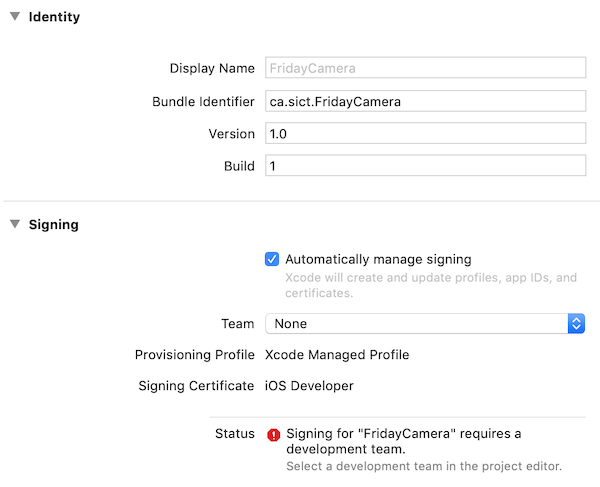
Notice the typical settings, similar to those in the image below:
- In the “Identity” area, the app has a valid and unique bundle identifier, in the right format
- In the “Signing” area, the “Team” item is currently set to “None”
- The “Status” item shows an error condition
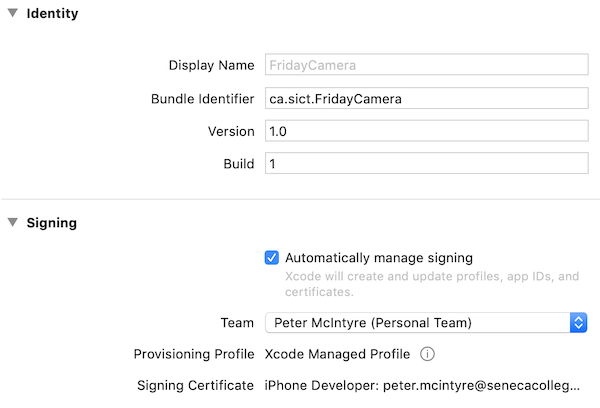
Now, change “Team” to whatever appears as your “Personal Team” item. After a few seconds of configuration, the “Signing” area is updated, and will show content similar to the following:
Build and run (Command+R)
Unlock your device, and show its home screen.
In Xcode, in upper-left area, set the active scheme to your device, which should appear at the top of the list.
Then build and run the app (Command+R). Within several seconds, the app will load on your device.
The first time you use a device with Xcode, it will likely tell you that you must change a security-related setting. Yes, do that.
The app, when loaded with the “run” task (Command+R), is still connected to Xcode, for debugging purposes. If you wish to run the app without the debugging connection, then stop the app in Xcode (Command+dot/period), and then start the app directly on the device.
It is likely that there will be a limit to the number of apps that can be installed on a device.
Similarly, there will be a limit to the number of devices that you can work with.
Therefore, please be flexible and adaptable.