![]()
DPS923 & MAP523
Mobile App Development for iOS
Notes Topics Weekly Resources Graded work Professor Code examplesDPS923 and MAP523 Assignment 4
Assignment 4 enables you to work with Core Data technologies, location services, and mapping.
Read/skim all of this document before you begin work.
While you are doing the work, if a specific task is not clear, or it seems to require an unreasonable amount of time to complete, contact your professor.
Due Date
Monday, April 13, 2020, at 11:00pm ET
Grade value: 18% of your final course grade
If you wish to submit the assignment before the due date and time, you can do that.
It is VERY IMPORTANT to submit your work before the due date and time.
This assignment CANNOT be late.
If it is not submitted by the due date and time, your Assignment 4 grade will be zero.
Overview and purpose
We need an app that will enable you to capture and store information about the food you eat during the day.
It is important for everyone to have good nutrition habits. Diet and nutrition issues are too easy for people to ignore and dismiss as unimportant, but good food brings health, both in body and in mind. Modern society and culture have increased interest in food and health, so an app like this could be useful.
In general, the app features include:
- Can capture info about a meal, the food items consumed
- The food item name or identification can be entered by you, or provided by a public web service
- Your additional notes/text can be added
- The new item will have its location info stored (where, when, and so on)
- Optionally, a photo of the meal can be taken
Here are some sample screen capture images… your scenes may look different.
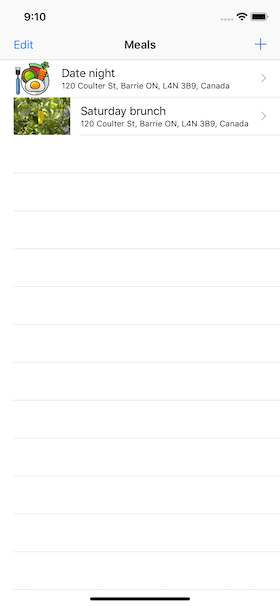
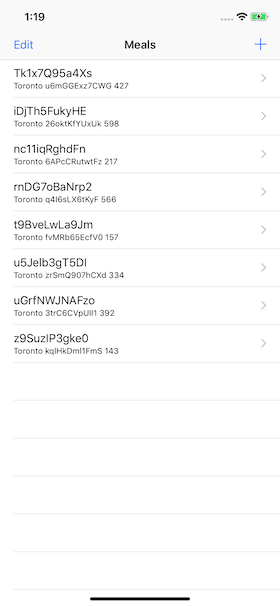
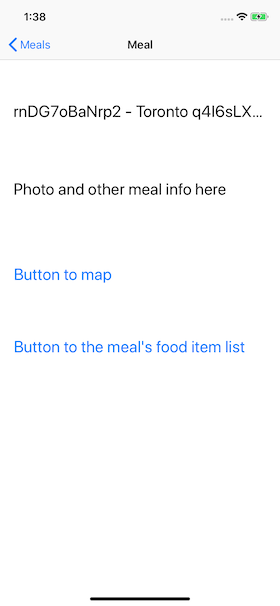
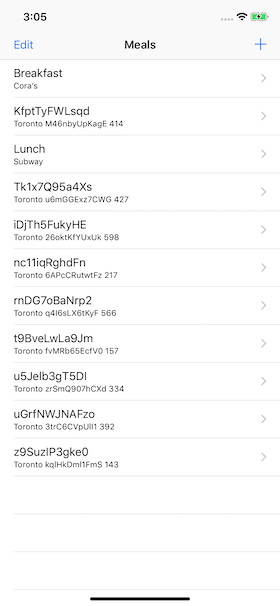
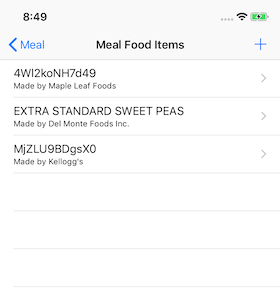
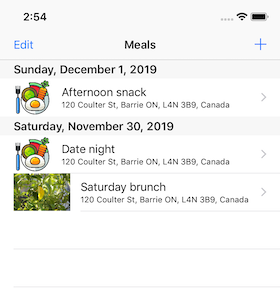
The “first launch” scene, which is a list of meals, and an info scene about a tapped/selected meal:

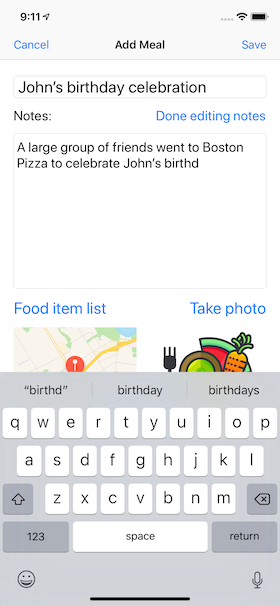
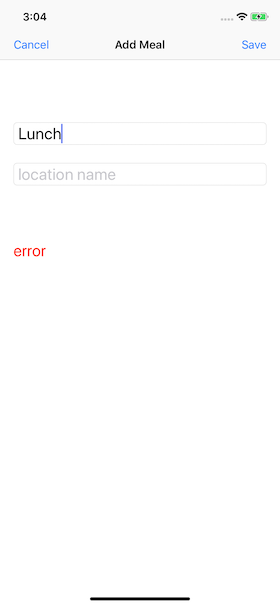
Add meal scenes, with keyboard visible during editing, and then after “Done editing notes”:

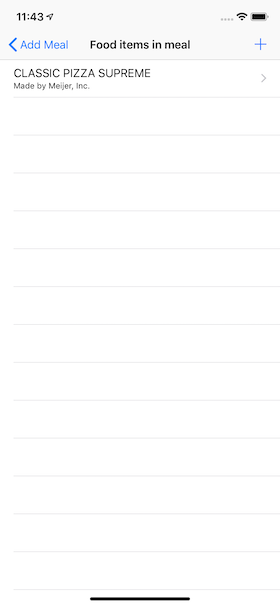
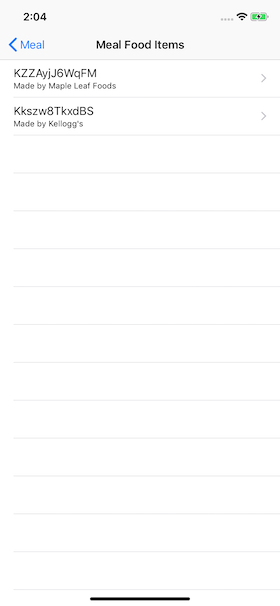
Tap the “Food item list” button to view the meal’s food item list, and after that, tap the “+” (add) button:
Search for a food item, setup, and list of possibles:
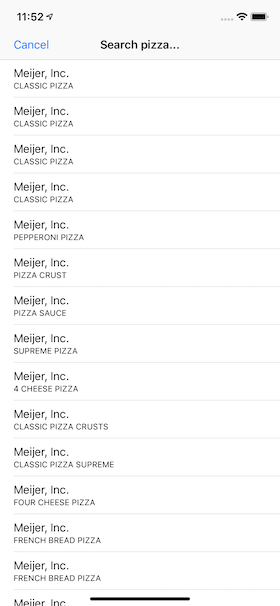
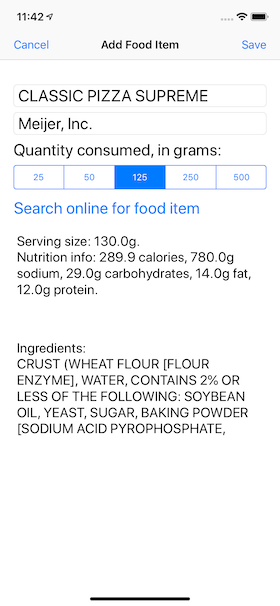
After selecting an item on the list, before and after saving:
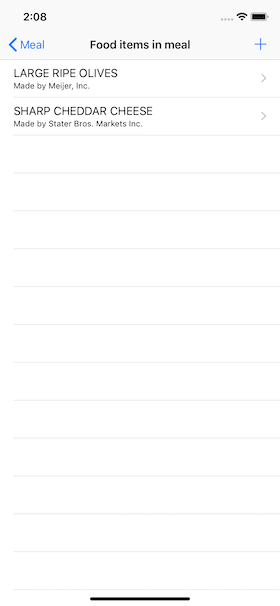
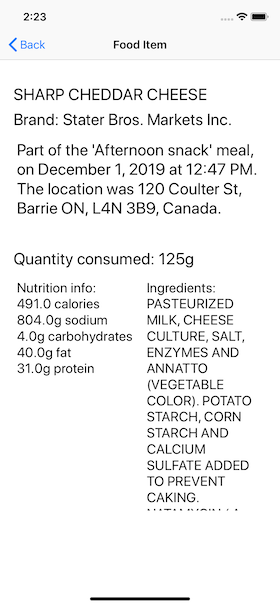
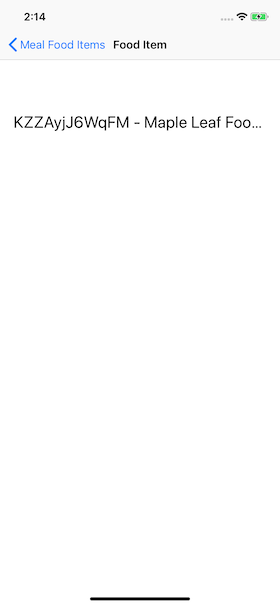
If you view the list of food items in a meal, and then drill down to a food item, this is what you’ll see:
DPS923 students will have a few additional specifications.
Getting started
Use the most recent version of the TemplateCD..., and create a project, probably named FoodDiary.
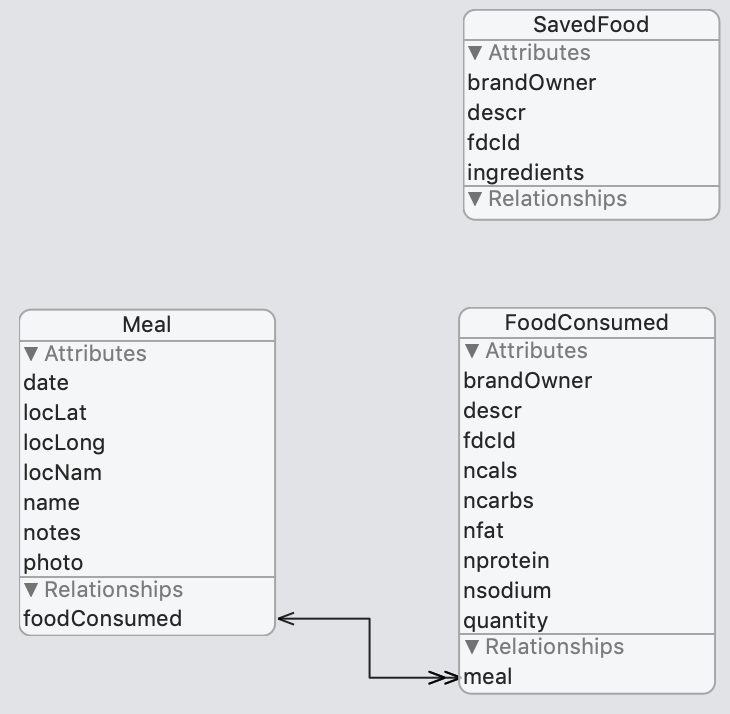
Create a Core Data model. There will be three (3) entities:
- Meal (will have a to-many relationship with FoodConsumed)
- FoodConsumed (to-one with Meal)
- SavedFood
Each entity must have the attributes it needs to implement the specifications. You may have to revise your data model as you work on the assignment. As an example, it could end up looking something like the following:
The “photo” attribute will be a “Binary Data” type, configured for “Allows External Storage”. To and from Swift, a photo is a Data type, so you’ll have to marshal it back-and-forth to an image when you display it (or capture it with a camera).
This was a Week 11 document that discussed this topic:
Core Data and photos
Build the navigation workflow
The idea in this section is to build the four-scene data-viewing workflow, using programmatically-generated data, before we get the “add” tasks and the web API involved. It will enable faster progress, easier testing, and improved confidence.
Edit the project to display Meal objects:
- Change the ExampleList controller name to MealList (Refactor > Rename)
- Edit the code to make it display Meal objects
- Edit the code to enable adds to the list
- You can continue to use the random string and integer functions in the store initializer
- We recommend that the “add” code also adds a few food consumed items to the meal; this will make future work more testable
- Edit the code to enable deletes from the list
At this point, your meal list may look something like this:
Next, add a meal scene:
- The easiest way is to create a new Swift file
- Then copy from the appropriate file in the Templates folder and then edit the code
- Then do the work to add, configure, and code the scene and segue
At this point, your meal scene may look something like this:
Next, add a food consumed list:
- The easiest way is to create a new Swift file
- Then copy the code from (maybe) MealList and then edit the code (or from the appropriate file in the Templates folder)
- Then do the work to add, configure, and code the scene and segue
Tip:
The data source for this food list must be a fetched results controller (frc).
Later, we’ll be adding items to the list, and the frc will easily enable the list update task.
Here’s a reminder about the way to think about building this frc.
At this point, your food consumed list may look something like this:
Finally, add a food consumed scene:
- Similar to the other “scene” task above
At this point, your food consumed scene may look something like this:
Checkpoint
At this point, you should have the four-scene data-viewing workflow, using statically-generated data.
Meal add workflow
Above, you used the built-in template method to add a new meal (and a few food consumed items) programmatically. In this section, we will code the actual “add item” workflows.
Adding a meal will be done incrementally:
- The “add item” pattern will be implemented
- The first goal is to add a new meal object
- It will enable the storage of a photo
- And the current location coordinates
- Then we will add the ability to display the meal’s list of food consumed items, which will start off empty
- The “add item” pattern will enable the addition of a food item to the meal
- Then we will add the ability to search then select an item from the web API, then save it
- Finally, the ability to segue to the meal scene (that was created above) will be configured
Add pattern, to add a new meal object
Break the connection between the meal list scene’s “add” button and the method that handles the programmatic add task.
Add a controller for the “add new” meal task. You can create it from scratch, or you can use some code from an appropriate file in the Templates folder.
In the save(_:) method, if you wish, you can add a few food consumed items programmatically. That will enable testing, and you can remove the code later/soon.
Do the rest of the work to add, configure, and code a scene and segue (from the meal list controller).
At this point, your add meal scene may look something like this:
And the result will be added to the list (which you can drill down into and see food consumed items, if you programmatically added them as suggested above).
Checkpoint
Make sure that you can add a meal, before continuing.
What’s next?
What’s next? During the “add meal” task, we want the user to interactively add “food consumed” items. We will use a web API to help with this task.
Web API introduction
The United States Department of Agriculture has a web API named “FoodData Central”. Visit the web site, and learn something about the service.
This is a BIG data source. It has thousands of food and nutrient items.
To use the web API, you must have an “API Key”. This is a string. It must be sent with every request to the web API. Follow the “Get an API Key” link in the middle of the page. You can use a College or personal email address. It will display your API key, and also send it to your email address.
Interact with the web API
Now, interact with the web API. How? Use Postman.
As you will read (follow the “API GUIDE” link), it offers two endpoints:
- Food Search - enter search terms like food name, brand, and so on, and it will return a collection of results
- This endpoint must use the POST method
- Food Details - using a unique food identifier (from the food search results above), it will return very detailed ingredient and nutrient information about that food
- This endpoint must use the GET method
The following is an example of the “Food Search”. In Postman, configure:
- A POST request
- URL is https://api.nal.usda.gov/fdc/v1/search?api_key=YOUR_API_KEY
- Content type header is JSON
- Entity body looks something like the following:
{
    "generalSearchInput": "peas fresh",
    "requireAllWords": true,
    "brandOwner": "monte",
    "includeDataTypes": {
        "Branded": true
    }
}
On March 9, 2020, at 8:05am, this request returned one result. Notice a few things:
generalSearchInputis a collection of words that you want to search for. The search is case-insensitive, and word order doesn’t matter - it will find results with these words anywhere in the food’s description.- Yes, we want to send
requireAllWords, set totrue, for all requests . - We want to include the
brandOwnerkey, with something or nothing in the value. That will help limit the results when appropriate. - Also include the
includedDataTypeskey-and-value for all requests.
Notice the results include a fdcId key, and its value is a six-digit integer. That’s the unique food identifier we need for the next query.
The following is an example of the “Food Details”. In Postman, configure:
- A GET request
- URL is https://api.nal.usda.gov/fdc/v1/468658?api_key=YOUR_API_KEY
- Accept header is JSON
Notice the URL - the six-digit integer replaces the static word “search” that you saw before.
On March 9, 2020, at 8:10am, this request returned a detailed result. Notice a few things:
- Ingredient and nutrient info is very detailed
- It essentially has all the data required on a product label (Ingredients and Nutrition Facts).
Experiment on your own. The documentation is useful.
Design and define structs for the web API interactions
Design and define structs for the web API POST request, and for both kinds of results.
Food Search, send (request)
Use the JSON above to guide your design for the struct used in the Food Search entity body.
If needed, use the Web API and data structures document to help with this task and the ones that follow.
Food Search, receive (response)
For the Food Search result, you are really interested in the foods array of items. Each food will definitely have a fdcId property. It will likely have a description property, but in general, maybe you should define most of the properties (other than fdcId) as optional. It is NOT necessary to code them all.
Food Details, receive (response)
For the Food Details result, it has a number of properties that may be useful to us and of interest to you:
- description
- ingredients
- serving size
- fdcId
- brandedFoodCategory
- labelNutrients (discussed next)
It has two embedded data structures:
- The
foodNutrientscollection is probably too much for our needs in Assignment 4 (so you can ignore it if you wish) - The
labelNutrientsobject is what we want to use - it has the macronutrient (and related) values that will enable us to do some arithmetic
Test the API in your app, checkpoint
If you wish, adapt one of your controllers temporarily, by adding code that will do each kind of requests (food search, and food details). It’s important to know that the structs are correct, and that encoding (for the POST request) and decoding (for the GET request) are working correctly.
This will not be throw-away work, because you can keep and re-use the code in the controllers that actually interact with the web API.
Add pattern, food consumed item
Now, we will replace the programmatically-generated food consumed items, for a meal, with the ability for the user to search for a food item. Therefore, we will modify the “add meal” scene. It will navigate to a list of food items (in that meal). That list will enable new items to be added to it, and those new items can be helped by a “select list” of results from a web API call.
Wait - we already have done a food list. Do we have to make another? Well, we have a choice - we can make another (and it will be almost the same as the other food list), or we can re-use the food list, and modify it to enable the “add” functionality.
To prepare for either choice, create a new standard view controller for the food item “add new” pattern. Most of its code can be copied from the add meal controller and then edited, or you can write it from scratch.
It needs a Meal property. When the controller loads, create a new meal object. Why? We must set the relation between an existing meal and the food items that we will add soon. However, please note that you must delete the meal object if the user taps the cancel button - you don’t want to save partially-configured objects that are not desired.
You can do this task in two phases.
Phase 1, hand-type the food consumed item details.
Phase 2, get the data from the web API.
Here are some preview images to guide you:
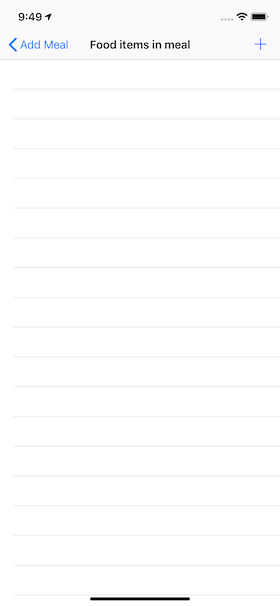
The following is the food item list scene. Notice the “add” button (+). It will modally present a scene with data entry fields.
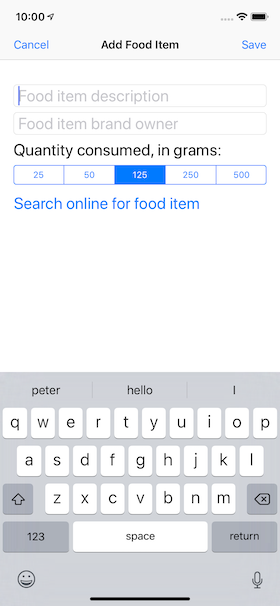
The following is a food item add scene. Enter the food description and brand owner. The idea is that a user can hand-enter the info, or use the search feature. The food item name is required, but the brand owner is optional. If you do not know any brand owner values, leave that field empty, and then look at the results for ideas. Then cancel out of the search, and run it again, and include a brand owner value. Remember, when you segue to the search scene, you must pass in these two values (food item name, brand owner).
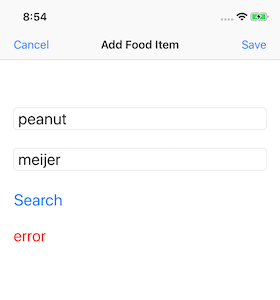
After “Search” button tapped, a list scene appears. It implements the new-to-you “select list” pattern that you learned in class during Week 11 of the course. (Yes, it’s supported by a code example etc.) For best results, add the web API request code to the controller’s load method.

Selecting an item from the list fills in the “Add Food Item” fields:
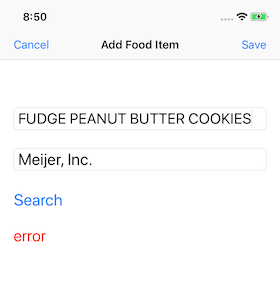
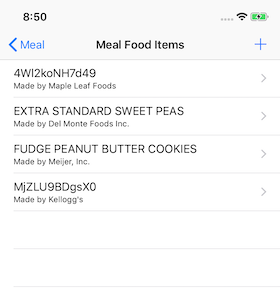
Tapping “Save” adds the item to the food item list for the meal.
Here’s a brief video, for Safari users only:
Checkpoint
At this point, the essential features of the “add meal” (and “add food items”) tasks will be done. Make sure it works successfully, before moving on to the improvements and refinements.
Improvements to the user interface
To reach this point, you have the two major “flows” of the app completed (display meal and food items, and add meal and food items). However, during that work, we didn’t pay much attention to the user interface and full functionality. In this section, we will improve and refine the app.
Here’s a list of tasks that must be done:
- In the meal list scene and controller…
- Show a thumbnail of the meal photo (or a placeholder) in the table view
- In the meal add scene and controller…
- Add (save) a timestamp
- Use location services to get the latitude, longitude, and (reverse geocode) string
- Use the camera to enable the user to take and save a photo of the meal
- Configure a text view to enable the user to add notes
- In the meal viewer scene and controller…
- Display - nicely - all data for that meal (including photo)
- Add a small-size map that shows where the meal happened; include a map annotation as the center point
- In the food item add scene and controller…
- Save the Food Central unique identifier
- Enable the user to specify the number of grams consumed, in a safe manner; allow only these gram numbers: 25, 50, 125, 250, 500
-
Save these macronutrient values: calories, sodium, carbohydrates, fat, protein
For the last point, the arithmetic must be correct - what’s that mean? Well, for example let’s assume that a food item had 15 carbohydrates (carbs) per serving size of 50 grams. Next, assume that the user selected 250 grams consumed. Therefore, the macronutrient value for carbs will be (250 / 50) x 15 total.
- In the food item viewer scene and controller…
- Display, in a pleasant and pleasing manner, information about the food item
- Make sure that some of the meal info is on that scene (so the user/viewer knows the context)
DPS923 additional functionality
DPS923 students must implement the following additional functionality:
- Use/display sections in the meal list (by date)
- Allow the user to select the meal’s date in the add scene (use a date picker)
- Sum the macronutrients of all the food items in the meal
- Use a segue “guard”, before attempting to search the web API
Display sections in the meal list (by date)
Modify the meal list controller so that it displays section headers (titles).
The Meal entity includes a date attribute, which is a value that has time info in it (hours, minutes, seconds). We cannot use the date attribute for the section header, because it will create a separate section header for each Meal object.
Therefore, we want just the year, month, date parts. Therefore, think about and code a date formatter that will generate a date in the format that you like.
To implement this, we will create a Swift extension, which will add a new read-only computed property to the Meal entity class. Wow.
Add the following to the bottom of the data model classes source code file, or add a new source code file named Meal+SectionInfo.swift.
extension Meal {
    @objc var sectionDate: String {
        get {
            // Create a date formatter object (e.g. "df")
            // Set its format to something you like
            return df.string(from: self.date!)
        }
    }
}
Next, modify the code that creates the fetched results controller. It must sort by the date attribute. And the section name key path must be this new property, sectionDate.
Select the meal’s date in the add scene (use a date picker)
Add a date picker to the meal add scene. Its initial value will be the current date-and-time.
Sum the macronutrients of all the food items in the meal
This is an example of the meal info scene, showing the sum of all food item macronutrients:

Use a segue “guard”
The NWPathMonitor class enables us to check for network connectivity. Read something about it here (and look elsewhere if you want to).
To simplify this task, monitor only the “wifi” network. (You do not have to fully consider all network types.)
This code can be placed inside a segue “guard” method that you will add to the controller that presents the list of web API search results. A sample implementation could look like this:
override func shouldPerformSegue(withIdentifier identifier: String, sender: Any?) -> Bool {

    if identifier == "toFoodSearch" {

        // Validate data...

        // Validate network connectivity

        // If all is good, return true
        // Otherwise, return false
    }
    return true
}
Testing your work
Test your work by running it on the simulator. Do this frequently and incrementally, after making any substantial changes. And, use the Xcode debugger to help.
When the app is complete, create screen captures, of each scene. Use a naming convention for the image names, something like this:
MealList
MealScene
FoodItemList
FoodItemScene
MealAdd
FoodItemAdd
FoodItemSearch
etc.
Also, a request: Each screen capture could possibly be large. If you open the png file in the Preview app, there is a feature on the Tools menu named Adjust Size. Change its width to 400 pixels (and it will automatically adjust the height). Then save, and it will reduce the size, sometimes dramatically.
Reminder about academic honesty
When you are ready to submit your work, you will copy some of the code in your project to plain text files, so that the My.Seneca/Blackboard “SafeAssign” tool can do its job. The next section will tell you which files to copy.
From the Blackboard web site:
SafeAssign compares submitted assignments against a set of academic papers to identify areas of overlap between the submitted assignment and existing works.
Submitting your work
Follow these instructions to submit your work, before the due date and time:
-
Locate your project folder in Finder (and we suggest that you make a copy for yourself).
-
At the same level, create a new folder named “MyCode”.
-
From the project folder(s), copy these source code files to the “MyCode” folder:
( all your controllers )
DataModelClasses.swift
DataModelManager.swift
Main.storyboard
For each of these files, change the file name extension to “txt”. -
From wherever, copy the screen captures into the MyCode folder.
-
Select the top-level folders:
(project)
MyCode
Right-click, and choose Compress 2 Items, which creates a zip file. The zip file may be sizeable, with all of the screen captures. -
Login to Blackboard/My.Seneca, and in this course’s Assignments area, look for the upload link, and submit your work there.